Learn how to use Rhino and fundamentals of 3D modelling, use this powerful software to bring your ideas and design into reality.
Rhino 3D is essentially a freeform surface model developing software that does not require manual coding to create different models. It allows you to create complicated powerful designs that are workable and extremely precise. It provides many 3D modelling tools that facilitate great precision from a 2D sketch to a 3D scan. Rhino is suitable for various usages, architecture, jewellery design, furniture, and any other kind.
Doesn’t matter what needs you are going to use Rhino. By completing this course, you will learn how to start with modelling and produce simple, however precise, models, which will be so helpful for your study and career.
If you know the basics of rhino and 3-dimensional space, you can start with the Level 2 course.


Learning objectives:
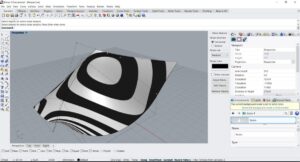
- Use the features of the Rhino user interface
- Customization of the program environment
- Create basic 3D objects—lines, arcs, curves, circles, surfaces, and solids
- Modify curves and surfaces with edit commands and gumball
- Modify curves and surfaces using control points
- Model with precision using coordinate input, object snaps, and SmartTrack tools
- Export and import models to and from various file formats
- Run simple renders using Rhino Render
- Dimension and annotate model with text and hatch
- Use layouts to arrange views of model on paper for printing
| Session | Learning objectives |
| 1 | introduction 3D space Menu Command prompt Toolbars View ports Osnap controls Navigating Move Copy Gumball |
| 2 | Change view Reset view Pan and zoom Display options Start drawing Saving files Modeling helpers Leyers Coordinate entry Making the arrow Making the v block |
| 3 | Object snaps Analyse commands Additional modeling aids Smart track Intro to construction plans Making the chair |
| 4 | Circles Practicing circles and use with snaps Arcs Making the mechanical arm Ellips and polygons Free-form curves Helix and spiral Making the toy screwdriver |
| 5 | Editing geometry Fillet Curve blends Loft Chamfer Transform commands Move Copy Undo & redo Rotate Groupe Mirror Join Scale More on gumball The 3D puzzle Trim Split Extend |
| 6 | Offset Array The camera The link About control points Control point editing Nudge controls Nudge settings Practice with control point editing |
| 7 | Modelling the rubber duck Modelling a bar with text |
| 8 | Simple surfaces Exercise closed polysurface box Extrude curves – retro handset Lofted surfaces – canoe Revolved surfaces – vase Rail Revolve – heart and star One rail sweeps Two rail sweeps |
| 9 | Network surface Making the table Modeling techniques- toy hammer Precision modeling Making the squeeze bottle |
| 10 | Transforming solids Flow along surface Flow along curve Dimensions Annotating the model Making 2D drawing Importing files to rhino Exporting rhino files |
| 11 | Materials and other features Rendering the toy screwdriver Rendering settings Raytraced mode Page layout and 2D printing |
| 12 | Review Assignment correction |
